What is a Warehouse Receipt?
In this quick tutorial, we will explain how to create Warehouse Receipt using Linbis Logistics Software. A Warehouse Receipt is a document that provides proof of ownership of commodities stored on a warehouse facility. Also for logistics providers such as Freight Forwarders, Forwarding Agents, NVOCC, Couriers, Third Party Logistics Providers, Airlines and Ocean Carriers; a warehouse receipt is the process of receiving commodities within their facilities and recording this entry in their logistics software. Goods can be stored in these facilities for a short time with the purpose of preparing export or import documentation required or also for long term storage and future distribution.
Steps to create a Warehouse Receipt
1- Click on the Warehouse Module locate on the left menu and then click on Receipts.

2-Click on the button new.

3-Fill the information for the receipt date, time, shipper, consignee and click on the save button.

4- Now it is time to enter the cargo details such as Package Type, Weight, Dimensions and Description. To do this go to the commodity tab and click add commodity.


5- Repeat the process for as many different packages as you have. All commodities will be added to the commodity list as shown below. For commodities that a location has been assigned, the commodity status will “On-Hand” as for the ones pending of allocation, the status will be “Received”.

6- In order to add attachments, click on the button located on the top right corner “Attachments”, and drag and drop any required file or pictures to be attached. Then click upload all.

7- To view the attached files at any time, you can click on the attachments button and go to each of the tabs depending of the file type. The check mark below the files, determines whether the file should be visible or not to the customer online account.

8- To print the Warehouse Receipt and Labels, click on the print button located on the right top corner and select the desired forms.

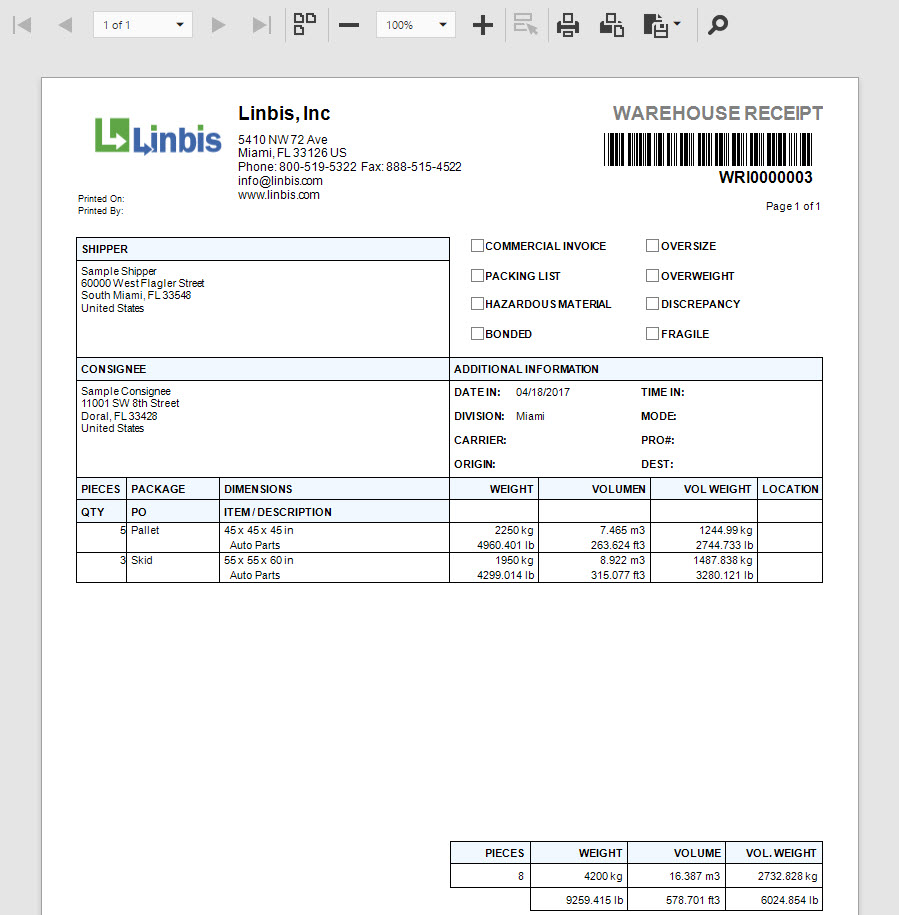
9- Warehouse Receipt Form (Print Preview)
10- Receipt Labels (Print Preview)

11- You can optionally update the Receipt Status if need. Whenever you complete each of the following steps:
-Weight-Measurements-Documentation-Attachments-Allocation-Completed
Notice that each status can be: Pending (Gray Color), In-Progress (Blue Color), Completed (Green Color)The system may automatically update these status depending on the settings, but in any case it is optional to do manual status updates. Click on Completed when you are 100% done with this receipt.

Congratulations!!! You have successfully created your first Warehouse Receipt.
Thank you for reading this tutorial and thank you for choosing Linbis Logistics Software.
One Response